How to Build Picnic Table Legs: Creating Sturdy Foundations for Outdoor Gatherings
Have you ever sat at a picnic table, only to find it wobbling and unstable? It can quickly turn a delightful outdoor experience into a frustrating one. The secret to a sturdy and reliable picnic table lies in its legs. In this article, we will delve into the world of picnic table legs and explore how you can build your own to ensure a stable foundation for your outdoor gatherings. So, grab your tools and let’s get started!
A. Importance of Sturdy Picnic Table Legs
Picture this: you’re hosting a delightful picnic in your backyard, surrounded by friends and family. As everyone settles down at the table, the last thing you want is a table that wobbles or collapses under the weight of the delicious spread. Sturdy picnic table legs are essential for providing stability, ensuring that your guests can enjoy their meals without any worries.
Not only do sturdy legs offer stability, but they also contribute to the overall durability of your picnic table. By investing time and effort into building robust legs, you can enjoy your outdoor gatherings for years to come, knowing that your table can withstand the test of time and outdoor elements.
B. Benefits of Building Your Own Picnic Table
Building your own picnic table offers a myriad of benefits beyond just the satisfaction of creating something with your own hands. Firstly, it allows you to customize the table to suit your specific needs and preferences. You can choose the dimensions, materials, and design that perfectly complement your outdoor space.
Moreover, constructing your own picnic table can be a cost-effective alternative to purchasing one. By sourcing the materials and doing the work yourself, you can save a significant amount of money while enjoying the process of building something functional and beautiful.
C. Overview of the Article’s Approach and Main Keyword
In this step-by-step guide, I will walk you through the process of building picnic table legs to ensure stability and durability. From understanding the different types of legs to preparing the necessary tools and materials, we will cover each aspect comprehensively. By the end of this article, you will have the knowledge and confidence to build your own picnic table legs that will withstand the test of time.
Now that we have set the foundation, let’s dive into the first section of our guide: “Understanding the Different Types of Picnic Table Legs.” Stay tuned for insights into various materials and their pros and cons. Together, we will embark on a journey to create picnic table legs that will elevate your outdoor gatherings to new heights.
Understanding the Different Types of Picnic Table Legs
A. Overview of Various Materials Used for Picnic Table Legs
When it comes to choosing the right material for your picnic table legs, there are several options to consider. Let’s explore the most common ones:
-
Wood: Wood is a classic choice for picnic table legs. It offers a natural and rustic look that blends seamlessly with outdoor settings. Popular wood options include cedar, pine, and redwood. Wood legs are relatively easy to work with and can be customized to match your desired aesthetics.
-
Metal: Metal legs provide a contemporary and sleek appearance to your picnic table. Steel and aluminum are commonly used metals, known for their durability and resistance to weathering. Metal legs are often powder-coated or galvanized to enhance their longevity and protect them from rust.
-
Plastic: Plastic legs offer a lightweight and affordable option for your picnic table. They are resistant to moisture, making them ideal for outdoor use. Plastic legs come in various colors and styles, allowing you to add a touch of vibrancy to your table.
B. Pros and Cons of Each Material
Each material has its own set of advantages and disadvantages. Let’s take a closer look:
-
Wood:
- Pros:
- Natural and aesthetically pleasing
- Can be easily customized to fit your desired dimensions
- Provides a warm and inviting ambiance
- Cons:
- Requires regular maintenance, such as sealing and staining, to prevent rot and decay
- Susceptible to warping and cracking if not properly cared for
- Pros:
-
Metal:
- Pros:
- Offers excellent durability and stability
- Resistant to weather elements, such as rain and sun exposure
- Low maintenance and easy to clean
- Cons:
- Can be more expensive compared to other materials
- Prone to heat absorption, making the table surface hotter in direct sunlight
- Pros:
-
Plastic:
- Pros:
- Lightweight and easy to move around
- Affordable option for those on a budget
- Resistant to moisture and insects
- Cons:
- Less durable compared to wood or metal
- Prone to fading and discoloration over time
- Pros:
C. Factors to Consider in Choosing the Right Type of Legs for Your Table
When selecting the ideal material for your picnic table legs, consider the following factors:
-
Climate: Take into account the weather conditions in your area. If you experience heavy rainfall or extreme temperatures, opt for materials that can withstand such environments.
-
Maintenance: Assess your willingness to invest time and effort into maintaining the table legs. Some materials require regular upkeep, while others may be more low-maintenance.
-
Aesthetics: Consider the overall look and feel you want to achieve in your outdoor space. Choose a material that aligns with your desired style and complements the existing decor.
By understanding the different materials available and weighing their pros and cons, you can make an informed decision when selecting the right type of legs for your picnic table. In the next section, we will delve into the process of preparing the necessary tools and materials for your project.
Preparing the Necessary Tools and Materials
A. Essential Tools for Building Picnic Table Legs
Before embarking on your picnic table leg-building journey, it’s crucial to have the right tools at your disposal. Here’s a list of essential tools that will help you achieve optimal results:
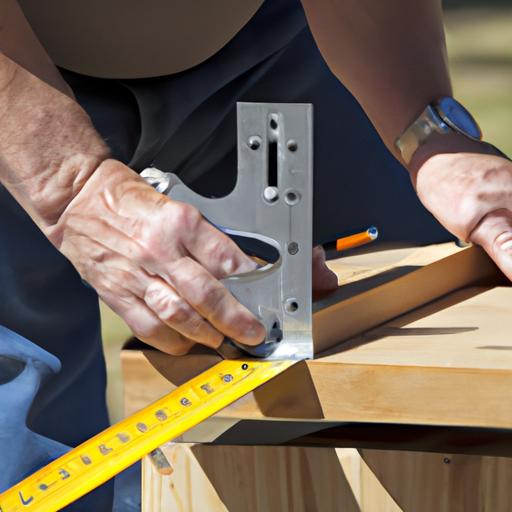
- Measuring Tape: Accurate measurements are the key to a well-constructed picnic table. Invest in a reliable measuring tape to ensure precision throughout the process.
- Circular Saw: A circular saw will come in handy for cutting the legs to the desired length. Make sure to choose a saw with a sharp blade for smooth and precise cuts.
- Drill: A versatile drill is essential for creating holes and assembling the legs securely. Opt for a drill with adjustable settings and a variety of drill bits.
- Clamps: Clamps are invaluable for holding pieces together while you work. They provide stability and ensure accurate alignment during assembly.
- Sander: A sander will help you achieve a smooth and polished finish on your picnic table legs. Choose a sander with varying grits to tackle different levels of roughness.
B. Recommended Materials for Sturdy Legs
The choice of materials for your picnic table legs plays a significant role in their strength and durability. Consider the following options:
- Pressure-Treated Lumber: Pressure-treated lumber is a popular choice for outdoor projects due to its resistance to rot and insect damage. It is an excellent option if you’re looking for long-lasting and low-maintenance legs.
- Cedar: Cedar is known for its natural resistance to decay and insects, making it another fantastic choice for picnic table legs. It also offers a beautiful aesthetic with its rich color and grain patterns.
- Metal: If you prefer a more modern or industrial look, metal legs may be the way to go. Steel or aluminum legs can provide excellent stability and durability, especially for heavy-duty tables.
C. Tips for Efficiently Gathering Necessary Supplies
To streamline the process of gathering your tools and materials, consider the following tips:
- Make a Checklist: Create a checklist of all the tools and materials you will need. Having a comprehensive list will ensure that you don’t miss anything during your shopping trips.
- Research Local Suppliers: Look for local suppliers or hardware stores that carry the required items. This will save you time and potentially offer better deals compared to online purchases.
- Compare Prices: Before making any purchases, compare prices from different suppliers. This will help you find the best deals and potentially save some money on your project.
Now that you’re equipped with the necessary tools and materials, we’re ready to move on to the exciting part—building your picnic table legs! Join me in the next section as we dive into the step-by-step process of constructing sturdy legs that will support your outdoor feasts.
Step-by-Step Guide: Building Picnic Table Legs
Are you ready to roll up your sleeves and embark on the journey of building your own picnic table legs? This step-by-step guide will walk you through the process, ensuring that you create legs that are not only sturdy but also aesthetically pleasing. Let’s dive in!
A. Clearing and Preparing the Work Area
Before you begin, it’s crucial to create a clean and organized workspace. Clear any debris or obstacles that may hinder your progress. Find a flat surface and ensure you have ample space to maneuver your materials and tools comfortably.
B. Measuring and Cutting the Legs to Desired Length
Accurate measurements are key to achieving the perfect height for your picnic table. Using a measuring tape, determine the desired length for your legs. Mark the measurements on each leg, ensuring consistency. Once marked, carefully cut the legs to size using a saw, taking care to maintain precision.
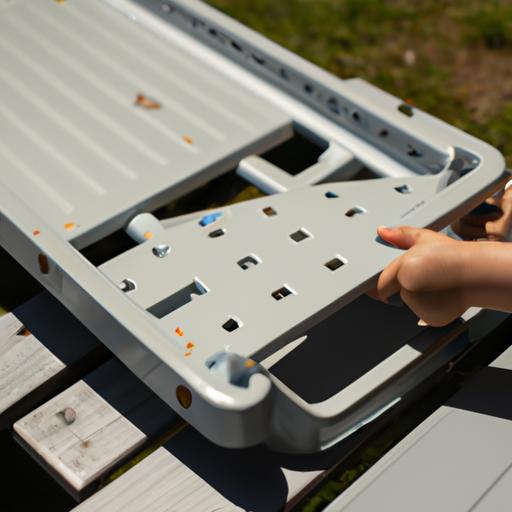
C. Creating the Leg Supports and Braces
To enhance stability, leg supports and braces are essential components of your picnic table legs. Measure and cut additional pieces of lumber to create the supports and braces. These will provide additional reinforcement, preventing any wobbling or sagging. Attach them securely to the legs using screws or bolts, ensuring a tight fit.
D. Assembling the Legs to the Tabletop Securely
Now it’s time to attach the legs to the tabletop. Position the legs at the corners of the tabletop and secure them using screws or bolts. Make sure the legs are aligned properly and flush with the edges of the tabletop. Double-check their stability before proceeding.
E. Reinforcing the Legs for Enhanced Stability
To further fortify your picnic table legs, consider reinforcing them with additional support structures. These can include cross braces or diagonal supports, depending on your design preference. These reinforcements will help distribute weight evenly, making your table even more stable and durable.
F. Sanding and Finishing the Legs for a Polished Look
Lastly, give your picnic table legs a polished and professional appearance by sanding them down and applying a finish. Use sandpaper to smooth out any rough edges or imperfections. Then, apply a suitable wood finish or paint of your choice to protect the legs from weather elements and enhance their aesthetic appeal.
Congratulations! You have successfully completed the construction of your very own picnic table legs. Get ready to showcase your craftsmanship and enjoy countless delightful outdoor gatherings with family and friends.